| CHAPTER | 2 |
| Form Completion System | |

|
|

|
The ProTax window is divided into a number of areas. These will be discussed in detail below. The largest area is referred to as the work area. By default this shows the form you are working on - as illustrated. Running along the bottom of the work are are a number of tabs that control what is currently showing in the work area. Separate sections below will discuss Form, Summary, Schedule, Computation, FBI, Log and Help.
The window to the left of the work area, with the coloured icons, is referred to as the navigation window. It allows you to add additional subforms for other sources of income such as employment.
The other windows are the menu bar and toolbar along the top
2.1.1 The LaunchBar

|
Along the top of many of the other Forbes programs you can see the launchbar shown above. It allows you to navigate quickly and easily from one Forbes program to another.
2.2.1 Moving around the form
The Form View is displayed by default. To come back to it from other views, click on the "Form" tab at the bottom of the screen.
Not all the form can be displayed on the screen at once, only part of one page. At any time one field on the form has focus. This is the field that you are currently editing. It is highlighted by a blue box.
You can change the focus field using the keyboard, or using the tools on the tool bar.
Pointing at a field with the mouse and clicking will set the focus to that field.
When you are stepping between fields as described in the previous section and you reach the end of a page, the next page is automatically displayed.
To change page use the page tabs down the right hand side of the Form window. Click on the appropriate page with the mouse, or using page up and down on the keyboard.

|
The page tabs also give visual indication of the currently selected page.
2.2.2 Jumping to a particular section
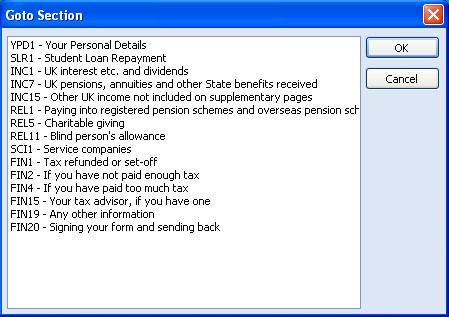
The Section List displays all the sections and subsections in a single list. Select Goto Section form the Goto menu. You can also press Ctrl-G on your keyboard.
The following dialogue appears :-
|
Using the arrow keys or your mouse select the section you wish to jump to and press OK. Alternatively double click on the section. The appropriate page of the form will be displayed and the focus will be set on the first field of that section.
2.2.3 Scaling
By choosing Scale from the View menu. You can magnify or shrink what you see on the screen. By choosing a scaling greater than 100% you will see less of the return at any time, but the text will be larger and consequently easier to read. A value of less than 100% will have the opposite effect. Use Scale to Fit to set the width of the form to that of your display.
The magnifying glass toolbar button cycles through various scales.
If you have still have particular difficulty in reading the display check the resolution to which you have set your monitor. This is done by in the Windows Control Panel. You should refer to your Windows documentation to do this. This will effect the display in all your Windows applications.
2.2.4 Entering information
To enter information on the form, first select the field where you want to enter the information. Follow the instructions in the Moving Around section to do this.
Once in the Moving Around section to do this. Once the required field is selected with the blue box, just type what you want to appear there. This will appear in the entry field in the tool bar. Above the entry field is a description of what the field is.
If you make a mistake go back and correct it with the arrow keys or delete keys on your keyboard. You can also use your mouse to edit the field.
Once you are happy with what you have typed press ENTER or press the OK (tick) button. This will transfer what you have typed in the entry field onto the form.
Selecting Cancel (cross) return you to the form without changing the field.
2.2.5 Tick boxes
Some fields on the form are tick boxes. Although you can type anything you want in the entry field, only a tick will be displayed. It is recommended you type the letter y in the entry field if you wish a tick to appear, and leave it blank if you do not want the box to be ticked.
2.2.6 Editing information
If there is a field on the form that has been filled in and you wish to change it, follow the procedure in Entering information on the form to highlight the field in blue.
To replace the field contents type in the new information that what you want to appear in the field and press the Enter key.
To edit what is there, to correct spelling errors etc, click with your mouse on the Entry Field or press F2 on your keyboard. Using the arrow keys, backspace key etc you may now change the text.
Once you are happy with what you have typed press the Enter key on your keyboard.
If you decide not to modify the data, press Esc on your keyboard.
2.2.7 Overwriting Formulae
Under certain circumstances you may wish to overwrite some of the formulae. To do this, you must select the box in question so that it is highlighted by a blue box. Then enter a figure in the entry field at the top of the screen, as per normal data entry. However, before pressing enter, place an exclamation mark (!) after the figure. An example is shown below.
Then press the enter key to overwrite the calculated figure with your own figure. In this example taken from the SA100, the automatically calculated figure of £500 in box 10.3 will be replaced by the figure of £250.
The figures that you have changed in this way will be shown in blue on the form. This allows you to identify which formulae you have overwritten. If you wish to revert to the original formula, simply delete the figure in the relevant box and press enter.
2.2.8 Additional Information
Some of the forms have additional information boxes, such as page 8 of the personal tax return for 2000. You can enter the data line at a time. Alternatively, you can use a text editor to enter data as a block. This allows you to reposition line breaks etc.
The first step is to go the first line of the additional information box you want to edit or enter data onto, as shown in the previous screen shot. Then select tools, followed by additional info. This will take you to a text editor screen which allows you to enter the data in normal word-processor format, as below:
The example above shows some data entered on separate lines, by using the return key at the end of each line. The text editor will automatically put in line breaks when you reach the right hand side of the window. Then click OK to transfer this data onto the form, as below:
It is possible to have more additional information than can be displayed on the form. This allows for attached sets of accounts to be transmitted via Electronic Lodgement.
2.2.9 Selecting a Form
If you wish to use a different form within the module, use Form... from the File menu. This will display a list of available forms in the format shown below.
First select the year you are interested in. Then select the appropriate form on the right hand side of the dialog box. Then select OK if you wish to access this form. If necessary, select New from the File menu to start on a new, blank form.
|
2.4.1 Introduction
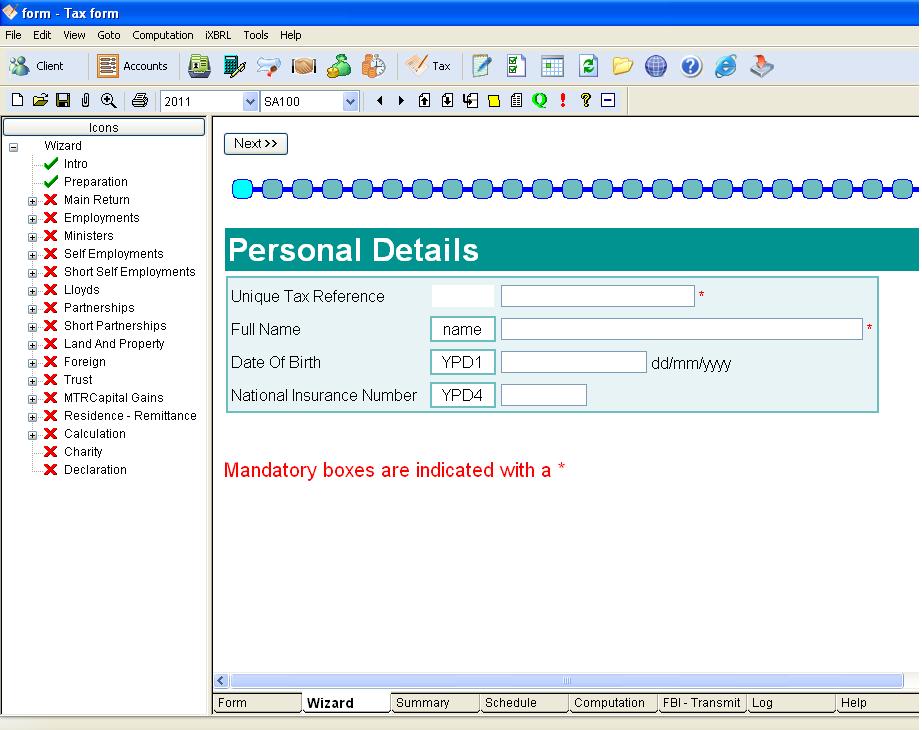
The wizard allows you to complete your tax return in a step by step manner. Select the wizard by clicking on the wizard tab at the bottom of the screen. It will ask a series of questions based on the tax return. Next to each box is a number that matches with the box number on the paper tax return. Use the next and back buttons to step through one screen at a time. Down the left hand side is a tree view. This shows you the various parts of the tax return. Any part of the tree can be clicked on to navigate to a particular page. There is also a handy indicator to let you see your progress. You can also click on the progress indicator to navigate back to a screen you have already completed.
2.4.2 Table Editor
At various stages in the wizard, e.g. on the Capital Gains additional pages, there are tables to be filled in. This is illustrated below on the page 'Gains or Losses From Quoted Securities'.

|
In order to enter information about these securities, the 'Table' button is used. This loads up the 'Table editor'. This allows you to enter line-by-line the information relating to that box. An example is shown below.

|
On clicking the 'OK' button - this closes the editor and enters any totals in the relevant boxes on the wizard.
The Table Editor can also be entered my clicking on the small 'calculator' buttons in Form view.
2.4.3 Help Sheets
Throught the wizard there are help notes written on most pages relating to the boxes in that particular section. These are based on the Inland Revenue help sheets and should provide you with the necessary guidance for filing in your return. Further help is also available by clicking on one of the various links in those help sections e.g. Help SheetIR222: How to calculate your taxable profits . This will launch a pdf file with the relevant help sheets. If you cannot view these files, then please download the latest adobe reader from www.adobe.com.
By choosing the summary tab at the bottom of the work area a summary of the information on the return can be produced. We recommend you keep a hard copy print out of this. This is very important when filing electronically.
The box numbers on the summary correspond to those on the tax return.
There are also the following 4 buttons that can modifiy the behaviour.

|
They are, in order:
2.6.1 Adding a Schedule
As well as the Inland Revenue additional pages, such as Self Employment, ProTax has further schedules that link into the main tax return. Examples of these would be bank interest or dividends. To add one of these schedules, go the box to which you wish to add a schedule, i.e. box INC3 on the SA100 form.
Then click on the schedule tab at the bottom of the screen.
ProTax will take you to the appropriate schedule. If there is no schedule linked to that box then ProTax will display all the schedules it can produce. Some of these are for earlier years forms.
|
2.6.2 Entering Data on a Schedule
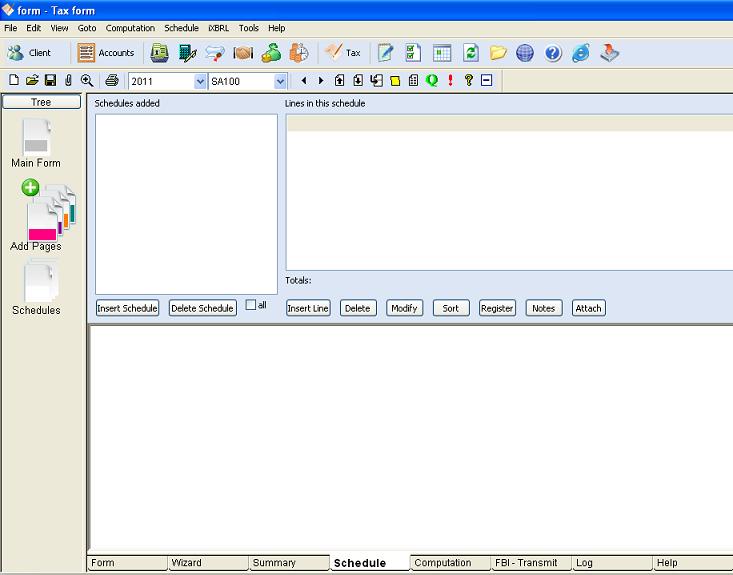
The schedule view contains 3 main windows. In the top half of the screen on the left is a window listing the schedules already added to this return. You may select a schedule from this list or add them using the insert schedule button. Unwanted schedules may be deleted using the delete schdule button. To the right hand side of the top half of the screen is the working window where you will enter the data onto the currently selected schedule. This is acheived using the Insert line, delete and modify buttons. The bottom half of the schedule view is taken up with the display window. This shows you what the final schedule will look like when printed. Ticking the "all" box below the schedule list window will display all schedules in the display window rather than just the currently selected one. Choosing File then Print will print the contents of the display window.
Start entering data onto the schedule. If you wish to display the totals on the schedule, select Show Totals, under the Schedule menu.
Upon completion of the schedule, use the tax return tab to return to the main form.
The figures from the schedule will automatically total onto the main form.
2.6.3 Printing a Schedule
Use File, Print when you are in the schedule that you want to print.
2.6.4 Saving a Schedule
This is not required as the schedule is saved as part of the tax return.
2.6.5 The Dividend Database
The dividend database is accessible to all your tax returns.
If you subscribe to our dividend database this will be prepopulated with all UK dividends. If you do not subscribe it will be empty but you may still use the facility to build up a dividend database of your own.
To access the dividend database, click on the schedule tab, then Insert Schedule, Dividends. Insert a new line and click on the Database button. If the software has correctly installed and the license unlocked, the first line should read 3I GROUP GBP0.50. Find the dividend you want and select OK. Fill in the number of shares and the net, tax and gross are automatically calculated.
2.6.6 Copy and paste
You can copy and paste schedules. For example to copy a schedule of dividends from a husband's tax return to the wifes, bring up the schedule of dividends on the husband's return. Choose Edit then Copy. Go to the wife's return, click on the schedule tab at the bottom of the screen and choose Edit then Paste.
You can also copy and paste schedules into additonal information. For example to copy a schedule of chargeable event gains into additional information on the main return, first complete the schedule and then choose Copy from the Edit menu. Click on the additional information box on the main return. Choose Tools then Additional Info. Press the paste button.
2.6.7 Notes
The notes button, to the right hand side of the screen allows additonal information to be added to a schedule
2.6.8 Chargeable event gains schedule
In cases where there are multiple CEGs over different periods, the information is entered in a schedule. This information was previously entered under TSR from the computation menu. The advantage of the new method is that more than 5 gains can be entered and a schedule can be printed. The schedule can also be cut and pasted into additional information - see 3.2
2.6.9 Overriding values
You can override calculated values such as tax credits on the schedules. Bring up the dialog, enter the net. Leave the tax credit to calculate in the normal way and then insert an exclamation mark ! at the end of the figure - e.g. 111.10! . You can now amend the entry.
By choosing the computation tab at the bottom of the work area, your income tax liability will be calculated. You should tick box 18.0 on the return if you plan to submit via the internet. This will then complete box 18.3 with the final figure from the computation
Payments already made can be entered by choosing "Payments already made" from the computation menu at the top of the screen
This tab is used for transmitting using the method of electronic transmission: Filing by internet (FBI).
See chapter 14.
2.9.1 Introduction
The log is a database for tracking the progress of items of work. Within ProTax the item of work being tracked is the tax return. The log is accessed by clicking on the "Log" on the tab bar below the work area. In order to use the log you must also have an active client database. If you do not have a client database, you will be asked if you want to generate one from your tax returns. If you do have a client database but it is out of date, you can update it from the information on your tax returns by choosing Tools/Advanced/Create clientbase
2.9.2 Events
You track the progress of a tax return through events. The system comes with the following events defined :-
In addition to the built in events, you can create your own using the "Events" button in log view. You can also use this button to discard some of the predefined events.
2.9.3 Adding and modifying Events
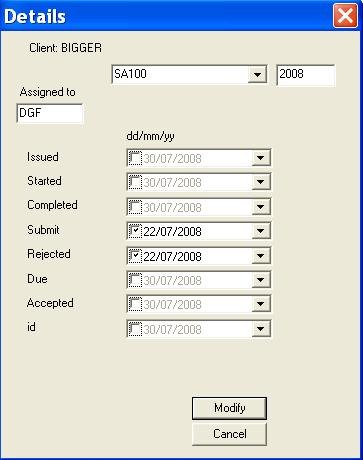
To add an event, select the client in the client list and press "Issued", "Started" or "Completed". To add other events than these, including ones you have defined yourself, use the "Edit" button.
To subsequently change the dates, use the "Edit" button.
|
The editing screen is shown above. Next to each event is a date entry field. The date entry field consists of three items :-
Above the list of events is the "who" box. This is for allocating the item of work to a particular worker.
At the start of a new tax year you may want to add "Issued" events to all personal clients. This can be done by choosing the "Log" menu, then "SA100", "Issue all".
2.9.4 Details
Pressing the details button brings up a report of all events for a client. First select the item in the line in log by clicking on the client code in the first column. Then press the details button.
2.9.5 Sorting and Filtering
The "Sort" button allows you to sort the list in ascending or descending order based on any event. This is useful for seeing which clients have for instance, not had the return accepted yet.
2.9.6 Electronic Filing
If you file electronically using Filing by Internet (FBI) then events are automatically added to the log.
2.9.7 Deleting
You can delete individual lines from the log using "Delete Line" from the log menu. If you choose "Delete entrire log" you will be given instructions for deleting the entire log.
2.9.8 Backing up
The log is stored in a file call "log.xml" in your clients directory. If you have installed in the default place it will therefore be "c:\forbes\clients\log.xml". We recommend you back up this file regularly.
2.9.9 Printing
Choose "File" then "Print" to print the log as displayed on the screen. Alternatively, select "Detail" for a detailed report and print this.
By choosing the help tab at the bottom of the work area you will be taken into the help system.
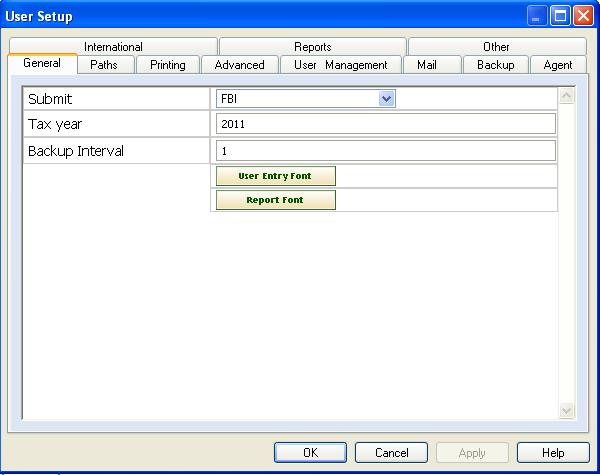
Selecting Tools then User Setup brings up the User Setup screen.
2.11.1 General
|
2.11.2 Paths
|
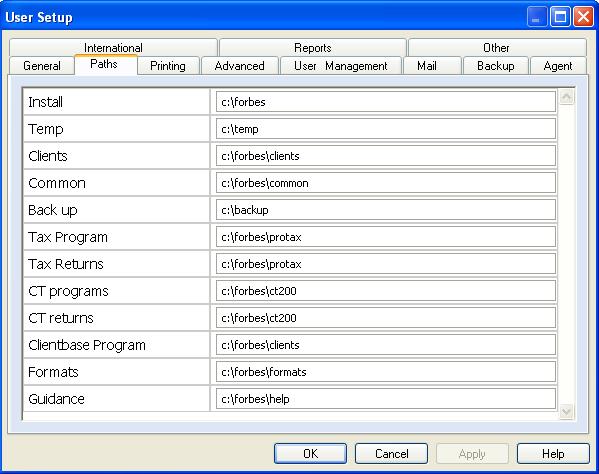
The paths show indicate to ProTax where various modules and data are installed. This screen shot shows the defaults
2.11.3 Agent Details
see chapter 3 section 3.5
2.11.4 Printing
|
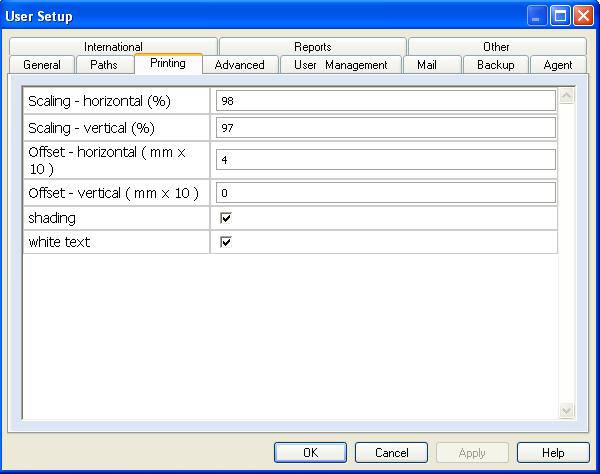
The offset parameters, X and Y affect the positioning of the top left of the output. They are specified in units of 0.1mm. If your output is coming out say 2mm too far to the right, subtract 20 from the value in offset X. In the example above it would be reduced to 10. It may also be negative. Similarily increasing X offset will move the output further to the right. To adjust the boxes along the top of the form, reduce Y offset to move the output up and increase it to move it down. Y offset is also specified in units of 0.1mm.
2.11.5 Internet Filing
see chapter 14 section 14.2.2
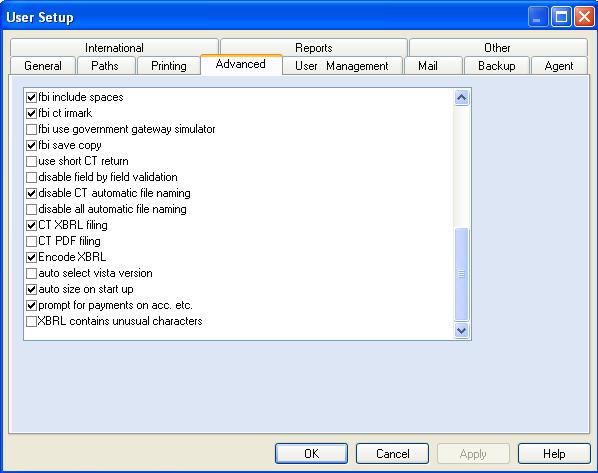
2.11.6 Advanced
|
2.12.1 Create database
Tools/Advanced/Create database - this creates a client database based on the information on the return
2.12.2 Clear carried forward figures
Tools/Advanced/Clear carried forward figures - this removes any remaining red figures
2.12.3 Agents details
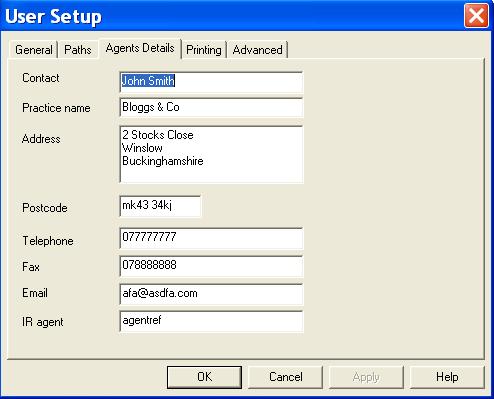
The agents details should no longer be entered in additional information. The best way to complete these is to enter the information under Tools/User Setup/Agents Details as shown below.
|
Once you have done this, the agents details will be entered onto all new returns and onto existing returns as they are brought forward. To read the information onto an existing return that you have already brought forward, choose "Tools" the "Default values" then "Read". For more information on default values please read the section below.
2.12.4 Default values
The way default values works has been modified. The basic idea remains the same - for each box on the return you may assign a default value.
Go to the box enter the value and the select "Default Values" from the "Tools" menu. Select "Set" from the submenu that appears to a set a default value for a particular box.
Default values appear on all new returns. They are also read onto existing returns as you carry forward from year to year. To read the information onto a return at any other time, choose "Tools" the "Default values" then "Read".
It is possible to view (and edit) a file containing all the default values by choosing "Tools" the "Default values" then "View". To clear ALL default values, select "Clear" from the sub menu.
2.13.1 Introduction
Each field on the form has a field name. These are used in Excel, clipboard links and in the .tax file format.
2.13.2 Finding the field names
Click on a field then choose Help then Field Name. Alternatively, to view all field names on the printed form press CTRL ALT and F1 and select the Field names item from the menu. Print the return.
2.13.3 Special field names
The following fields do not correspond to boxes on the return
| name | description | example |
|---|---|---|
| form | the form to use | sa100_00.frm |
| year | the year of the return | 00 |
| subforms[x] | a list of additional pages to include | E 1 |
| rid | the return ID printed along the top of each page | D G Forbes 11111 22222 |
| barcode | the barcode to print on the return | -9520446678\2H\31900\1m |
| modify_time | a time stamp of when the return was last changed | 957795649 |
2.13.4 The .tax file format
The .tax file format is a simple text file that can be opened using notepad. The entries on the form appear one per line, field name followed by one or more spaces, followed by a value. You can view (and edit) the data using notepad or view / source.
There are three ways of transferring data between Excel and ProTax.
1. Clipboard 2. OLE automation programming. 3. Named ranges.
The first method is by far the simplest.
2.14.1 Clipboard method
Produce in some part of your excel spreadsheet a couple of columns that summarise the data (possibly pulling in the information from elsewhere using formulae) as in the following example
| INC1 | 50000 |
| INC3 | 5000 |
| SE1.FSE8 | 322 |
Highlight the block, select Edit then Copy. Go into ProTax, add a set of pages, in this case self-employment, using the multicoloured "add pages" button. Go to the edit menu and choose "paste boxes".
An example excel spreadsheet is available here
example.xls
2.15.1 Other
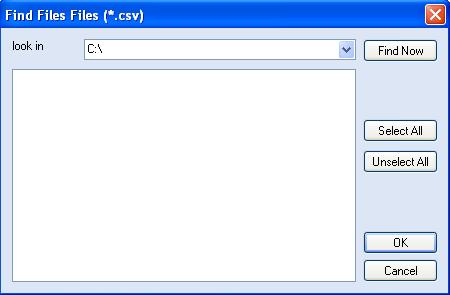
To import a number of files choose File then Import. The following screen will be displayed
|
Select the folder or hard drive you wish to search in the "Look in box". Press Find Now. After a short wait the file list will be completed with a list of files. These will automatically all be selected. To import just a subset of these files, use "Select All", "Unselect All" and by clicking in the list with the mouse. Finally press the OK button.
You can send an information request to your clients based on their previous year's tax return.
To do this, open a ProTax SA100 return. When it asks you if you wish to carry data forward, click no. This loads up the clients tax return. Go to Tools, Information Request or click on the green 'Q' on the toolbar. This then loads up an information request form with spaces for your clients to fill in the data for this year.
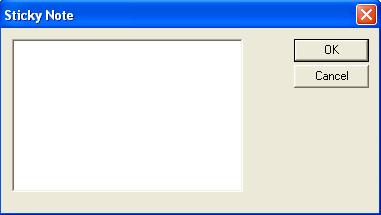
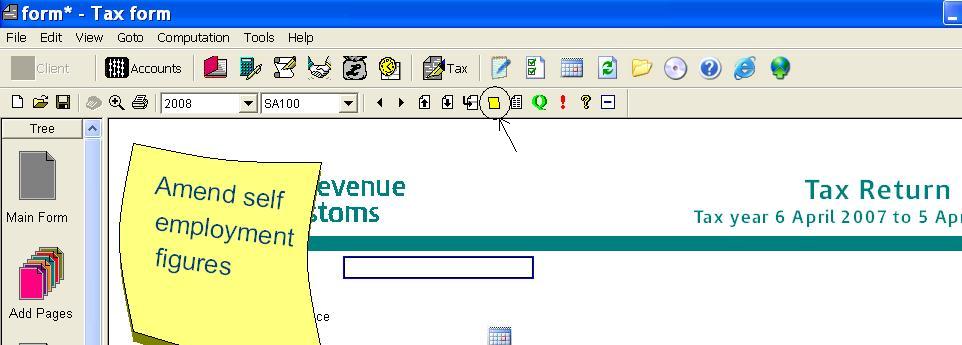
A 'Sticky Note' can be added to a tax return to help you keep track of what is still to be done on the return. After having opened a clients return, click on the Tools Menu then Sticky Note. A dialog then comes up for you to fill in any information you wish, i.e. amend self-employment figures.
|
Click OK and then this note will be displayed on page one of the tax return. This be saved with the return and will remain on page one until you go back into Tools, Sticky Note and delete this text.
|
2.18.1 Introduction
It is possible to edit the layout of the computation and support multiple computation layouts. To use this facility you will need the latest "protax" and "other modules" updates installed.
Choosing computation then edit puts the computation into editable mode. You can make temporary changes to the wording or figures, but they will disappear next time you run a comp.
2.18.2 Computation / Advanced / Edit Layout
This will bring up the format editor for the currently selected computation layout (see below for selecting different layouts). This may be edited. It consists of text, substitute fields in square brackets [ ] and control entries in column 1 appearing in red. Full details of the formatting will be in chapter 9 of the manual when it is released. If column 1 is blank the line will always appear. If it contains "if (expr)" then the line is conditional and will only appear if "expr" is a non zero. For instance if you want SE income to always be shown, even when zero, remove the condition from this line.
When you have finished editing, use File / Save As to save the layout. It is strongly recommended you use save as and choose a different name rather than overwriting the built in sa302_05.htm. For example save as "sa302b_05.htm" Make sure you leave the _05 part in place (see "selecting" below). Formats are stored in the \forbes\formats folder.
2.18.3 Computation / Advanced / Select Layout
It is possible to switch between multiple computation layouts by choosing this command. When prompted amend the default "sa302" to say "sa302b". This computation layout will be used next time you run a comp and will remain in force until you use the command again to set the layout back to sa302. The actual layout file is in the \forbes\formats folder. It will have the "_05.htm" automatically appended to the name.
