| CHAPTER | 16 |
| Forbes Wave iXBRL Tools | |

|
|
16.1.1 Overview
Wave iXBRL Tools are a selection of tools for creating and viewing iXBRL. The majority of the document describes the Editor, a tool for creating or editing an iXBRL document. There is also a Viewer, covered in "Wave Viewer" [SectionWaveViewer] and a "Wave Taxonomy Browser" [SectionWaveTaxonomyBrowser]. There are some example excel spreadsheets which have tagging hints embedded in them to automate the process. These are covered in "Excel Templates"[SectionExcelTemplates].
16.1.2 iXBRL
iXBRL is an HTML document with certain figures and other information labelled or tagged. Although many wordprocessors and spreadsheets have facilities to save as HTML, it is often not of suitable quality. We find the best way is to open the source document in OpenOffice and then save in the native Open Document Format (.ods for spreadsheets, .odt for wordprocessing). Forbes Wave can read the open office document directly and convert it into HTML. It can also convert recent Microsoft Office documents (xlsx and docx formats).
OpenOffice is available free of charge from
http://www.openoffice.org
16.2.1 Installing the software
The software can be installed or updated from the following link
http://www.forbes.co.uk/wave/index.htm
16.2.2 Starting the programs
From the Windows Start button, select Programs, Forbes Systems and then Wave.
You will be prompted for the start and end dates of the current and previous periods, the company name and CH reference number.
Dates must currently be entered in XBRL format -- YYYY-MM-DD
The easiest way to get started is to use the tagging wizard.
You will be able to tag the majority, if not all, the document in this way. You can then use full taxonomy tagging to tag any remaining items you wish to tag.
Open the document, click on the Tag tab then Choose Wizard/Show
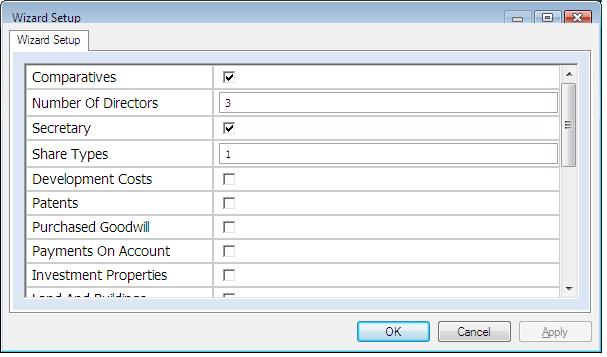
You will first be asked some basic information to configure the wizard.
|
You can customise the wizard to show the appropriate number of directores etc. To bring up this screen again simply hide then show the wizard again.
In this setup screen you can select whether the wizard should take you through manually tagging comparatives. If there are no comparatives or you are going to use AutoTag/Comparatives then untick this option.
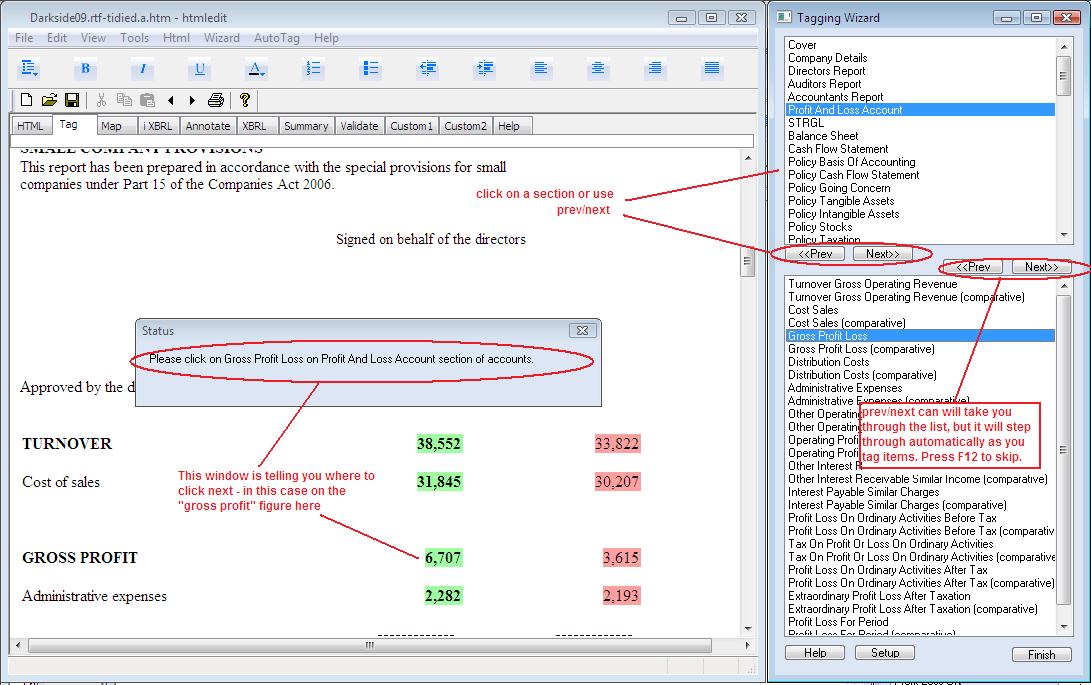
The tagging wizard will take you through a typical set of accounts allowing you to simply click on the items in order.
|
To go to full taxonomy tagging Choose Wizard/Hide
16.6.1 Tagging
Filter button will allow you to show a subset of elements related to where you are working
Mapping button will show you your work so far.
16.6.2 Period
In the period drop down there are choices for current financial year and previous financial year. The latter is for tagging comparatives.
Below this is a box to specifiy whether this figure is for a duration or an instant. It will be selected automatically based on the taxonomy element selected. Profit and loss items are based on duration. Balance sheet items at an instant (period end). Very occasionally you will need to tag an item as "at period start". You must manually select this option.
16.6.3 Dimension
For certain items as well as selecting the element you must select the dimension. For example for tangible assets "Additions for the year" needs to be also labelled with "Motor Cars" or "Land and Buildings".
The "dimension" drop down lists commonly used or predefined contexts.
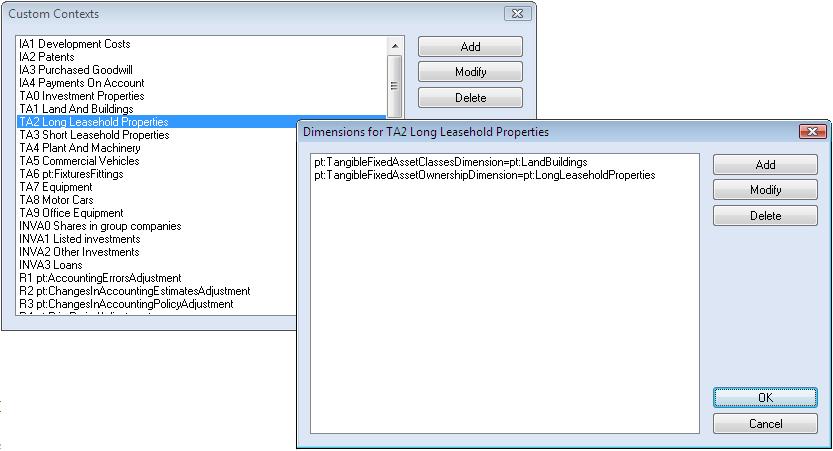
Pressing the "MORE>>" button includes two options "Predefined Contexts" and "Custom Contexts". The first of these lets you see how the commonly used contexts are defined. The second allows you to define your own. See the next section for more details.
16.6.4 Viewing and editing contexts
|
16.6.5 Type
The main iXBRL types are
This will normally be automatically selected
16.6.6 Negate
Most XBRL tags are positive even if shown as a negative on the face of the accounts. For example CostOfSales - is normally shown as a negative on accounts as it is a deduction.
Tick negate to make the value negative
16.6.7 Tuple
In XBRL a tuple is a means of grouping xbrl elements together. For example for a related party transaction the name of the parties, the amount etc are grouped together.
The most common tuple elements you will come across are -
When you tag a child element of a tuple such as NameOfParty then the software will automatically add the tuple parent if it has not already been added. You may edit the tuples using the tuple button under "more>>"
16.6.8 Unit
The unit defaults to GBP for numeric data. You may choose a different unit e.g.
When using other than GBP please ensure you are entering a valid iso1417 value.
16.6.9 Format
This is predominantly used when tagging dates. You may use the ixbrl ixt name such as ixt:datelonguk or the wave abbreviation e.g. DT2. Choosing more>> then date format will bring up a pick list.
Normally the date format will be automatically selected. Unless you tick the option under Tools / User Setup / Advanced, Unitied States date formats will not be included in the list.
16.6.10 Scale
If the numbers in the accounts are in thousands or millions you can specify this with scale. You can set the overall scale of the numbers in the XBRL parameters. You can overide this global setting on a per element basis using the scale field.
Scale is expressed as a power of 10.
16.6.11 Combine
Often there is a need to tag a whole section. This is called block tagging. An example would be PolicyStocks. Highlight the block and then tag. Click at the start of the block. Click at the end of the block
16.6.12 Slice
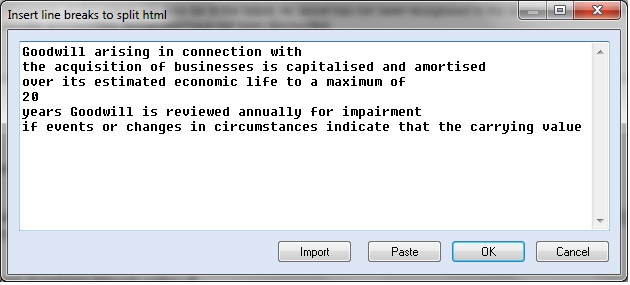
Sometimes there maybe more than one item that you wish to tag within a single HTML element. Choose more>> then slice.

|
Insert lines breaks to indicate the separate taggable parts. You may also take this opportunity to edit the text.
|
The line breaks are only to indicate the separate taggable parts and will not be shown in the iXBRL document.
16.6.13 Detach
To remove the tagging from an element use more>> then detach
16.6.14 Hidden Section
ixBRL has something called a hidden section. It is used to contain information that cannotn be tagged in the normal way because:
To put an element into the hidden section select the tag, tick the hidden checkbox and type in the value. Then press OK.
To view the elements in the hidden section, use hidden from the more>> button.
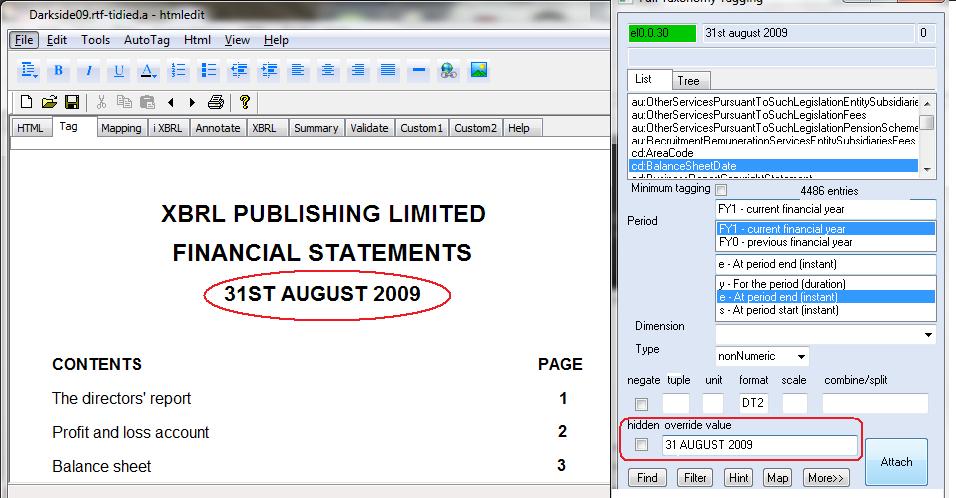
Dates in the format 31ST AUGUST 2009 is not acceptable in iXBRL (the "ST" is not allowed). See section "Overriding values" below.
|
Fill in the amended value and press attach. The HTML in the generated iXBRL will be amended as it is produced. If you want to leave the visual apearance of the HTML in the iXBRL unchanged you can transmit the amended value in the hidden section by ticking the hidden box. If you want to add an entry to the hidden section that does not correspond to an entry type a unique id in the id box (or leave it blank and you will be prompted), tick hidden, fill in the value and press attach. You can check the value has been tagged by looking at the summary tab.
Guidance on what tag to use where is rather beyond the scope of this document, however there follow some links to example tagged documents in HTML format and Excel format on the HMRC website.
Once you have tagged the current year figures, AutoTag - comparatives will tag the comparatives with the same tag but different context
AutoTag depends on the layout of the source HTML. It will not work in all cases.
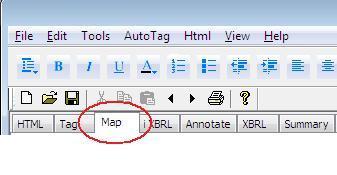
The tagging operation is producing a list of tagging instructions to produce the iXBRL from the input HTML file. This list of tagging instructions is referred to as the map. You may view the current map by clicking on the map tab.
|
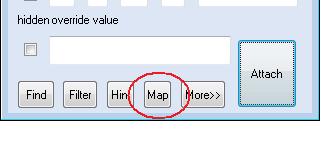
You may edit the map file using the map button at the bottom of the Full Taxonomy Tagging window.
|
You can open an existing iXBRL file and view or edit the tagging. It is recommended that you name the file xxxxxx.xbrl.htm
See [SectionFileNamingConvention] for further information on file names.
16.13.1 Starting from HTML
All that is needed to be kept is the first two items. The remainder will be regenerated by the software.
16.13.2 Starting from for example excel
All that is needed to be kept is the first three items. The remainder will be regenerated by the software.
16.14.1 Rendering of negatives
iXBRL requires that the brackets showing a negative number are outside the iXBRL element. To tag say (234567) by default we render this as
<span>(</span><ix:NonFraction etc.>234567</ix:NonFraction><span>)</span>
This is the most robust approach, but can result in padding around the brackets that some people find offensive. You can choose
Tools / User Setup / Advanced - no spans around brackets
and the brackets will be simply be #text children which improves the visual appearance but may cause problems with other software. The data above would be rendered:
(<ix:NonFraction etc.>234567</ix:NonFraction>)
This setting may not take effect until you restart the software.
16.16.1 Introduction
Wave includes facilities for "tidying" an HTML file. It is available with in the wave program or as a separate process.
16.16.2 As a separate process
c:\forbes\common\fcmd tidy source destination
for example
c:\forbes\common\fcmd tidy general_electric.htm test1.htm
This will take the HTML in general_electric.htm and that in the linked HTML files found in the general_electric_files folder and produce as its main outout test1.htm. You should verify that test1.htm opens and displays correctly.
It also produces test1.htm.xml (the same file but with a different file extension) so that you can double click on it to verify that it is valid xml also.
16.16.3 Within Wave
Open the .htm and then choose Tools / tidy if it is a single worksheet or tools / concatenate for multiple sheets.
16.17.1 Introduction
If you are using Excel or a similar spreadsheet program to items for tagging you can use the facility for naming cells and ranges to tell Wave Editor what tag to use. There are two main methods for doing this. You can use our predefined names listed below or even just take the example shown. Alternatively you can use your own names, tag one example using the normal methods covered in "The Tagging Process" [SectionTheTaggingProcess] and then use the tagging map file created for this job as the starting point for subsequent ones. Both these approaches can be used to completely tag or the document or just to give you an automated head start to the process. Open the document to tag in the normal way then choose Autotag / From Spreadsheet Hints.
16.17.2 Cell Names
A complete list is available in the software by choosing Help / Spreadsheet Hints.
rangenames.htm
16.17.3 Example Spreadsheets
An example spreadhseed with ranges named is available here
Sample1.xls